Table of Contents
Media > Morph Images
This page allows an initial image to fade out as a second image fades in. This can be done to;
- create the impression of zooming in, as the demo below illustrates
- or to create a kind of “before and after” effect.
To create a zoom-in effect, you create a Zoom Region on the initial image; for the “before and after” effect the Zoom Region might be the whole of the initial image.
Example demo
or view at Xerte Page Types - Media: Morph Images (opens in new tab)
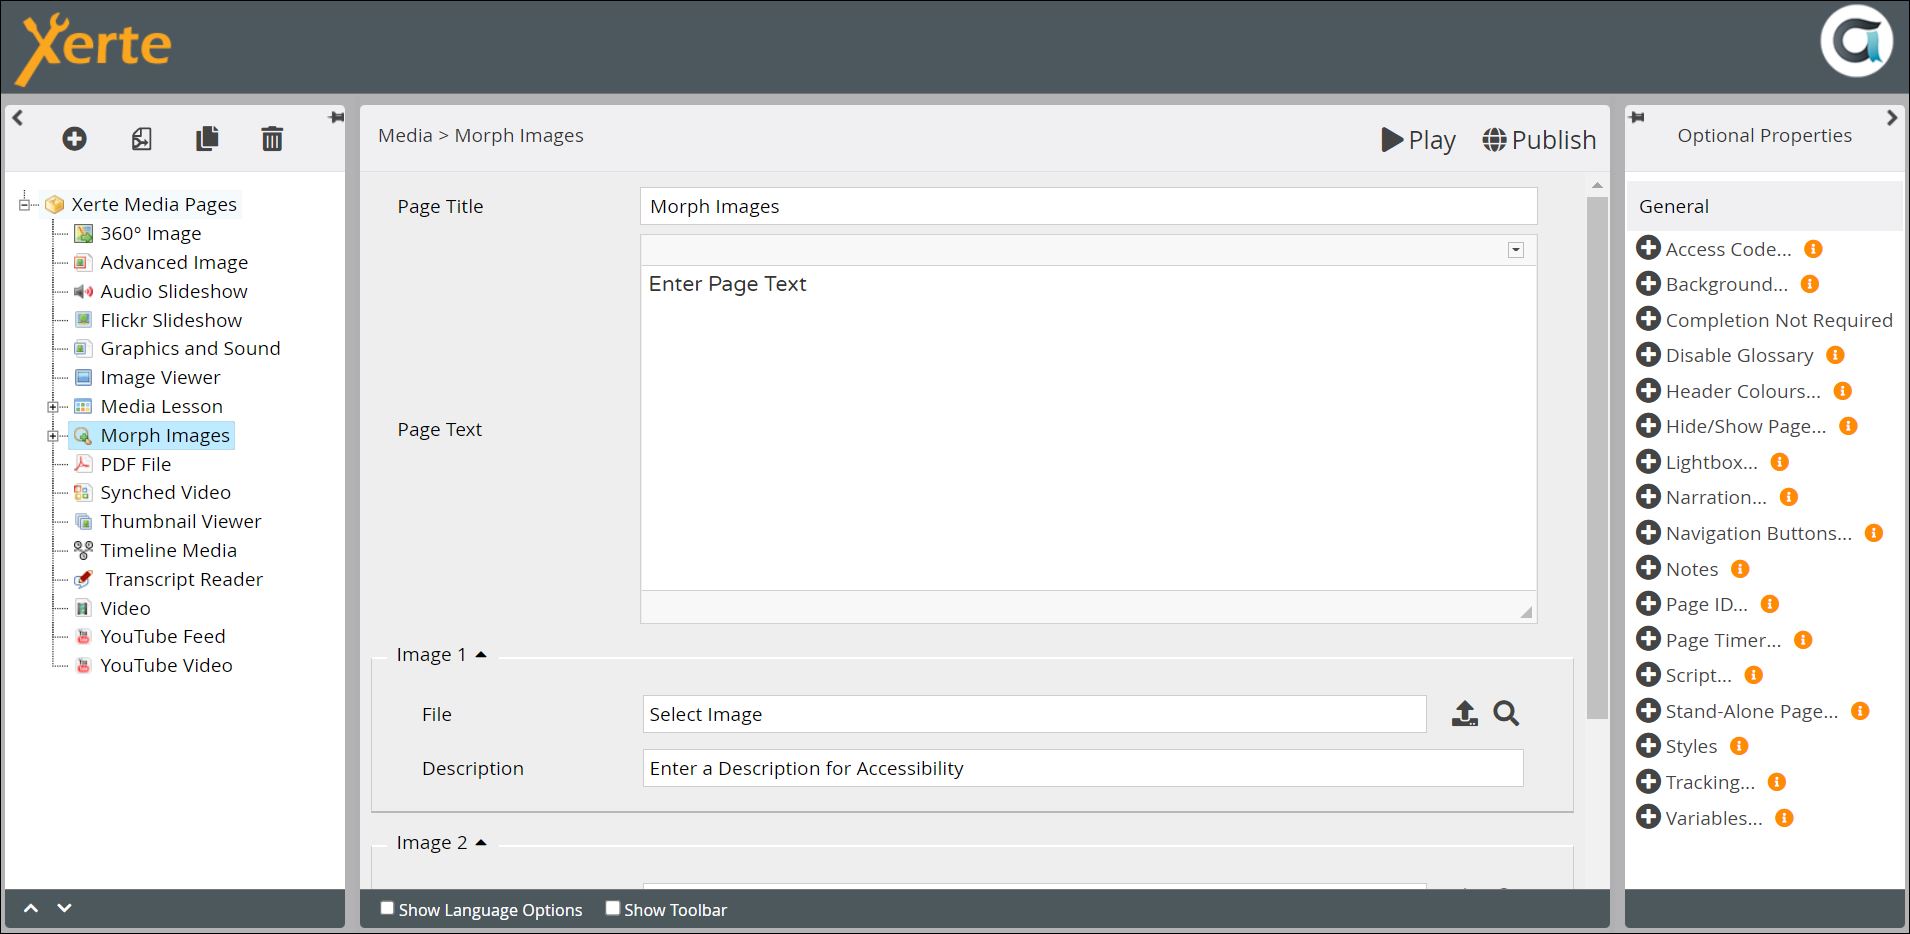
Editor interface
Core Properties
| Property | Description | Type | Additional information |
|---|---|---|---|
| Page Title | Text that appears in the header of the published page. | Text | |
| Page Text | Text and any other content you want to have displayed on the page. | Text+ (Toolbar) | You can add images, tables, sound, video and other content through the Page Text editor. |
| Image 1: File | Upload the initial image here, through the Media Browser. | Link to Media Browser | |
| Image 1: Description | Enter a Description for Accessibility. | Text | |
| Image 2: File | Upload the second image here, through the Media Browser. This is the image which fades in when the learner interacts with the page. | Link to Media Browser | |
| Image 2: Description | Enter a Description for Accessibility. | Text | |
| Zoom Speed | The number of seconds for the transition from the initial image to the second image. | Number | Default - “3” |
There are no page-specific Optional Properties for the Core Properties.
Language Options
| Property | Description | Type | Additional information |
|---|---|---|---|
| Zoom Button Label | Text on the button which initiates the transition to the second image. | Text | Default - “Zoom” You will need to change this if you want, for example, a “before and after” effect, with no zoom. |
Zoom Region
If you want to create a zoom-in effect, you need to identify the region of the initial image to zoom in on. In the Project structure click on the + icon next to your Morph Images page.
This will reveal the Zoom Region “nested page”. Click on it to edit.
| Property | Description | Type | Additional information |
|---|---|---|---|
| Zoom Region Label | This is just a label which appears in the project structure in the authoring programme. It is not visible to learners. | Text | |
| Edit Hotspot. | This is used to create the zoom region. Click on the thumbnail to open the Hotspot Editor. | Link to Hotspot Editor |
There is only one Optional Property, which allows you to add a Tooltip which is read aloud in screen readers.
Further Information
If you are creating the zoom-in effect, it can be fiddly to ensure that Image 2 and the Zoom Region match up. You will probably have to display Image 2 in another application, for comparison as you edit the Hotspot, and adjust the borders accordingly.


