Table of Contents
Hotspot Editor
A hotspot is an area on an image which produces a response when the learner clicks on it. On click, the edges of the hotspot may be highlighted, for example, and some text revealed, or the hotspot may allow an object to be dropped into it. The following pages include hotspots, and all make use of the Hotspot Editor to create and edit the hotspots.
| Page type | Description |
| Interactivity: Annotated Diagram | When learners click on a hotspot in an image this makes a connection with text items in a list outside the image. |
| Interactivity: Drag and Drop Labelling | Hotspots in the image will accept a label that is dragged and dropped in the correct position. |
| Interactivity: Hotspot Image | When learners click on a hotspot, a label and some text appears. |
| Interactivity: Hotspot Question | Learners are presented with a question, and to submit a correct response they have to click on one or more correct hotspots. |
| Media: 360° Image | When learners click on a hotspot on a 360° image, they are presented with a lightbox including text, audio, video or a multiple-choice question. These may be linked to other pages or 360° images. |
| Connector: Hotspot Image Connector | The hotspots in the image take the learner to either another page in the project or an external page, or bring up a lightbox. |
For each of these page types there are different settings related to hotspots, and these are described on the individual Wiki pages for each one. However, the process for creating and editing the hotspots is the same for all these page types and is explained below.
Adding the image
First the image needs to have been imported into the XOT Media Browser for the project (add link). You can either do this before you add the image to the page, or as you are designing the page. Add the image through this page property.
Creating a Hotspot
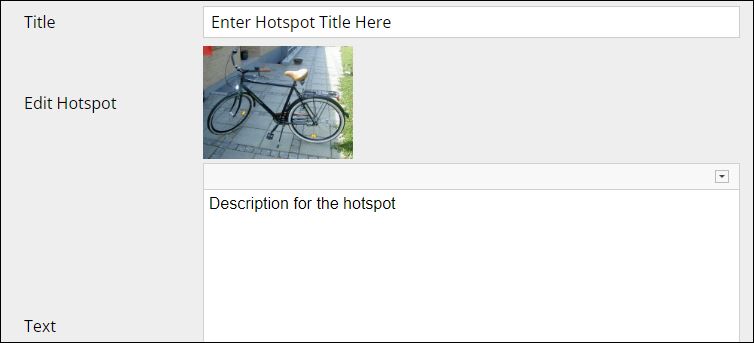
When you create a New Hotspot you will then see a thumbnail of the image with a red rectangle in the top left corner. Here's an example.
Click on the thumbnail to open the Hotspot Editor.
When you get into the Editor the hotspot can be either a rectangular shape or a shape with an irregular outline. Rectangular hotspots are quick and easy to create. Ones with an irregular outline take a little longer, but you will get better at creating them with practice, and they can still be done fairly quickly if you are not too fussy about how exact the match of the hotspots is to the shape in the image.
Rectangular hotspots
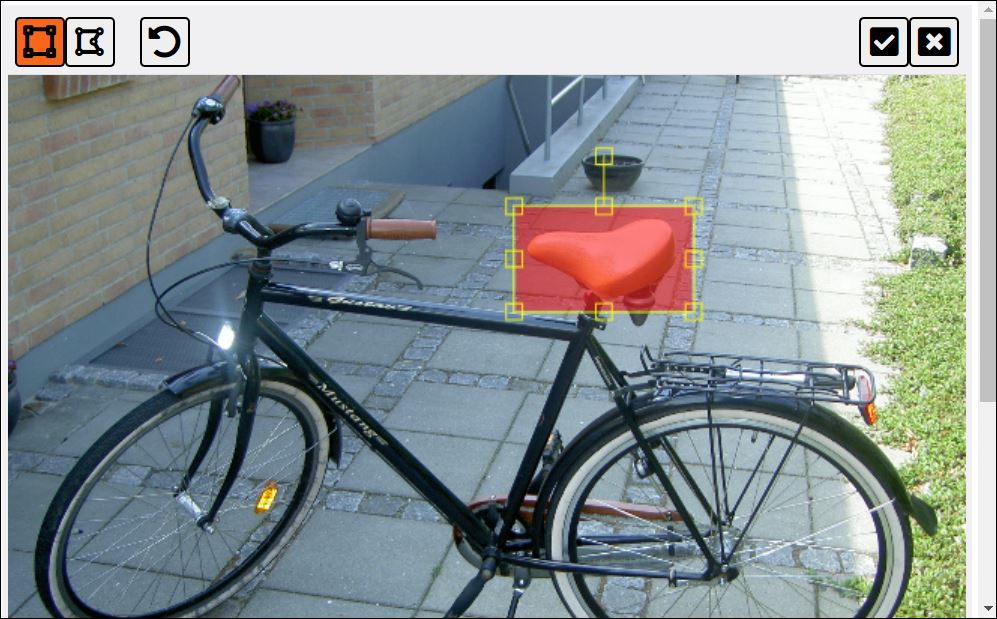
Make sure the first icon in the top left corner of the Editor is selected, as in the image below.
Drag the red rectangle into roughly the right position, and then use the handles in the corners and at the sides to resize it until you are happy with it.
Click on the 'tick icon in the top right corner to save the hotspot and close the Editor window. You can then repeat the process to add further hotspots.
Irregular-shaped hotspots
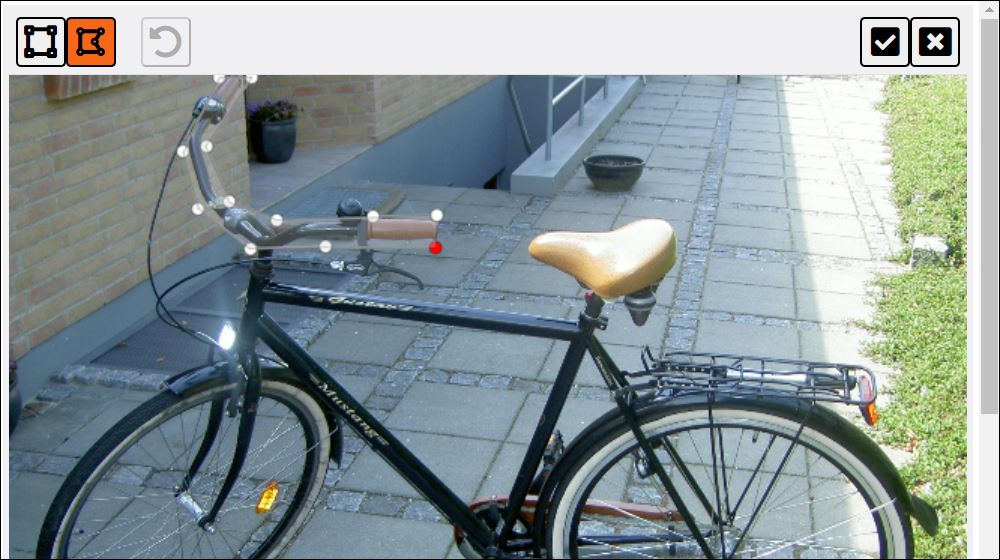
Select the second icon in the top left corner of the Editor, as in the image below. Then click in one corner of the shape you want to draw. A red dot will appear, and this is your starting point. You then need to move round the outline of your shape, clicking at the angles of the shape. Each time you click this leaves a white dot linked by a straight line to the previous dot, as the image below shows. Your final click should be be back on the red dot, and this will complete the hotspot, which will now appear as red translucent overlay on the image. If you are happy, click on the 'tick' icon in the top right corner to save the hotspot, and close the Editor window.
Further information
One issue you will have to bear in mind when considering using an image and hotspots is accessibility. What will be the impact on visually impaired students? Have you got an alternative task format for such students?
You can use a diagram including text as the image for a Hotspot Connector page, but the same accessibility issues apply here.


