Table of Contents
Admin panel: Templates (management.php)
In this area of the admin panel, you can manage the templates that are available for authors to use.
Parent templates
By default, there is a parent template for:
- Site - this is a Bootstrap template for website creation.
- Xerte - this is an XOT template for interactive learning object creation.
- Decision - this is a decision tree template. This is now available as a 'page type' in an XOT project and therefore this template can be hidden if required. Any brand new installations of Xerte will have this default template disabled (new in 3.13).
Note: The template name for most projects will be either ‘Nottingham’ (for the default XOT template) or ‘site’ (for the default Bootstrap template).
Since Xerte was launched there have been no new 'parent' templates developed. Xerte administrators generally customise their installations by adding sub-templates (see below), as this is technically more straightforward. However, it is possible for Xerte administrators to add to this top-level (or Parent) list of templates via FTP (only for brand new parent templates). Via FTP, the new template files will need to be added to the 'Modules Xerte Templates' and 'Modules Xerte Parent Templates' folder.
Sub-templates
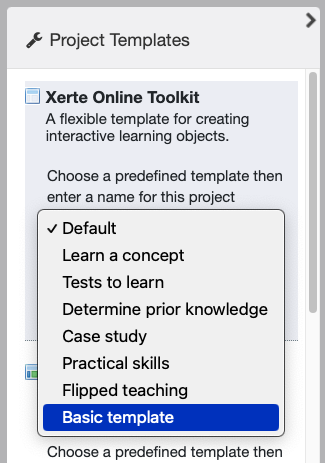
Xerte administrators also have the ability to add sub-templates. Sub-templates are pre-designed XOT, Bootstrap or Decision Tree projects that form the basis of any newly created projects that use them (example sub-template menu in image below).

See the Xerte release notes for instructions on how to create sub-templates. Note that if the sub-template already exists, it will be replaced if you upload a sub-template with the same name.
Managing existing templates
How the existing templates display to users can be edited in this section. By clicking 'Show' beside the template you can adjust its settings.
